Photogrammetry 101: how to make a 3D model from photos
How to do photogrammetry: plan the overlap, fly or walk the capture, put down control, process the photos, check the result and hand over the files. With a planner for the overlap.
Published · 12 min read · By Malya, the makers of Clarity
Photogrammetry done well is mostly done before the first photograph. The processing is automatic and forgiving; the capture is neither. This page is the whole job in six steps, from a blank flight plan to a volume somebody will sign, written for a site survey from a drone, with a note at the end on how the same six steps apply to an object on a table.
1. Plan the capture
Four numbers decide the survey before you leave the office: the height you fly at, the overlap along and between lines, and the size of the site. From them follow the pixel size on the ground, the number of photographs, the flight time and, roughly, the accuracy. Move the sliders and watch all of it change.
- Pixel on the ground (GSD)
- 2.7 cm
- Photos
- 50
- Flight lines
- 5, 52 m apart
- Photo every
- 25 m
- Flying time at 8 m/s
- 4 min
- Pixels per metre
- 36
Rules of thumb: 75/65 overlap for open ground, 80/75 over vegetation or buildings, and a GSD two to three times finer than the accuracy you need. For the camera arithmetic on its own, the GSD calculator.
Three rules of thumb cover most sites. Fly for a pixel two to three times finer than the accuracy you need: for 5 cm, a 2 cm pixel (the ground sample distance calculator gives the height for any camera). Use 75% front and 65% side overlap on open ground and raise both towards 80/75 over vegetation, buildings or anything with steep faces. And plan the flight to extend one full line beyond the area you care about, because the edge of a block is always its weakest part.
- Height
- Sets the pixel. 80–120 m is usual for a site with a 1-inch sensor; lower for a 1 cm pixel, higher for large areas.
- Overlap
- 75/65 minimum. Height accuracy comes from each point being seen from many places.
- Lines
- Parallel lines across the site; add a second set at right angles (a cross-grid) on sites with little texture or a long thin shape.
- Obliques
- A few lines with the camera tilted 20–30° stiffen the block and fix most doming. Cheap insurance.
2. Capture
On the day, the plan flies itself; the pilot’s job is the things the plan cannot know. Light: even is better than bright, and hard noon shadows that move between lines are worse than either. Wind: a small drone crabbing into a crosswind tilts its camera and smears its pictures. Exposure: lock it, so neighbouring photographs match; a camera left on automatic will brighten over a dark pit and darken over a pale stockpile and the matcher will notice. Speed: slow enough that the shutter freezes the ground (and, on a rolling shutter, slow enough that it does not lean).
Before take-off
- Targets laid out and surveyed, with a photo of each so it can be found later.
- Camera on manual exposure, focus at infinity, shutter at 1/1000 s or faster.
- Memory card empty, batteries for the whole plan plus a spare, RTK fixed before launch.
Before leaving the site
- Thumb through the photographs: sharp, evenly exposed, no gaps in the lines.
- Every target visible in at least five photographs, not cut by the frame edge.
- Position log (RTK/PPK) saved beside the images, not only on the controller.
The flying guide goes through each of these in the detail a pilot wants.
3. Control and scale
A block of photographs solved on its own has the right shape and no idea where it is or how big. Something has to tie it to the ground. On a site that is one of two things, and the best surveys use both.
Ground control points are targets laid on the ground and surveyed with a GNSS rover or total station, then clicked in the photographs after the flight. Five to ten spread across a site, with some at the edges and some at the lowest and highest ground, is a usual number; more for a large or long site. They are the single most effective thing for vertical accuracy. RTK (or PPK) positions every photograph to a few centimetres as it is taken, which fixes the horizontal position well with no targets at all, and reduces how many targets are needed for the vertical.
4. Process
Processing is the part that looks like the whole job and is the least of it. Load the photographs and their positions, mark the targets, start the run. Depending on the software it may ask for a quality setting (which trades time for resolution in the dense cloud), a coordinate system (use the one the targets were surveyed in, by its EPSG code) and what to produce. A few hundred photographs take an hour or two on a workstation; several thousand, most of a day. Cloud processing moves the same job to a machine sized for it and hands the results back in a browser.
The how it works page shows what is happening in that hour, step by step, with the real pictures.
5. Check
Open the report before the model. Four things in it tell you whether the survey is sound: how many photographs were aligned (all of them, or a reason why not); the reprojection error, in pixels (tenths are good); the residuals at the ground control points (how far the model is from each target after the fit); and the errors at the check points, which are the ones to quote. Then look at the model: the edges, any blank surfaces, the places where the lines overlapped least.
- Photographs aligned
- All of them. One or two left out at the edge is normal; a block of them is a problem with that line.
- Reprojection error
- 0.3–0.7 pixel is usual. Over 1 pixel, look at the lens model and the shutter.
- Control residuals
- Within the pixel size at each target. One large one is probably a target mis-clicked or mis-surveyed.
- Check-point RMSE
- Horizontal 1–2× pixel, vertical 2–3× pixel, on a survey with targets. This is the number to report.
6. Deliver and measure
The deliverable is rarely the model; it is a number somebody needs. A stockpile volume, a cut and fill against a design, a set of contours, a progress comparison with last month. Those are measured on the elevation models and the orthomosaic in the viewer, with the method printed next to the result so the number can be defended.
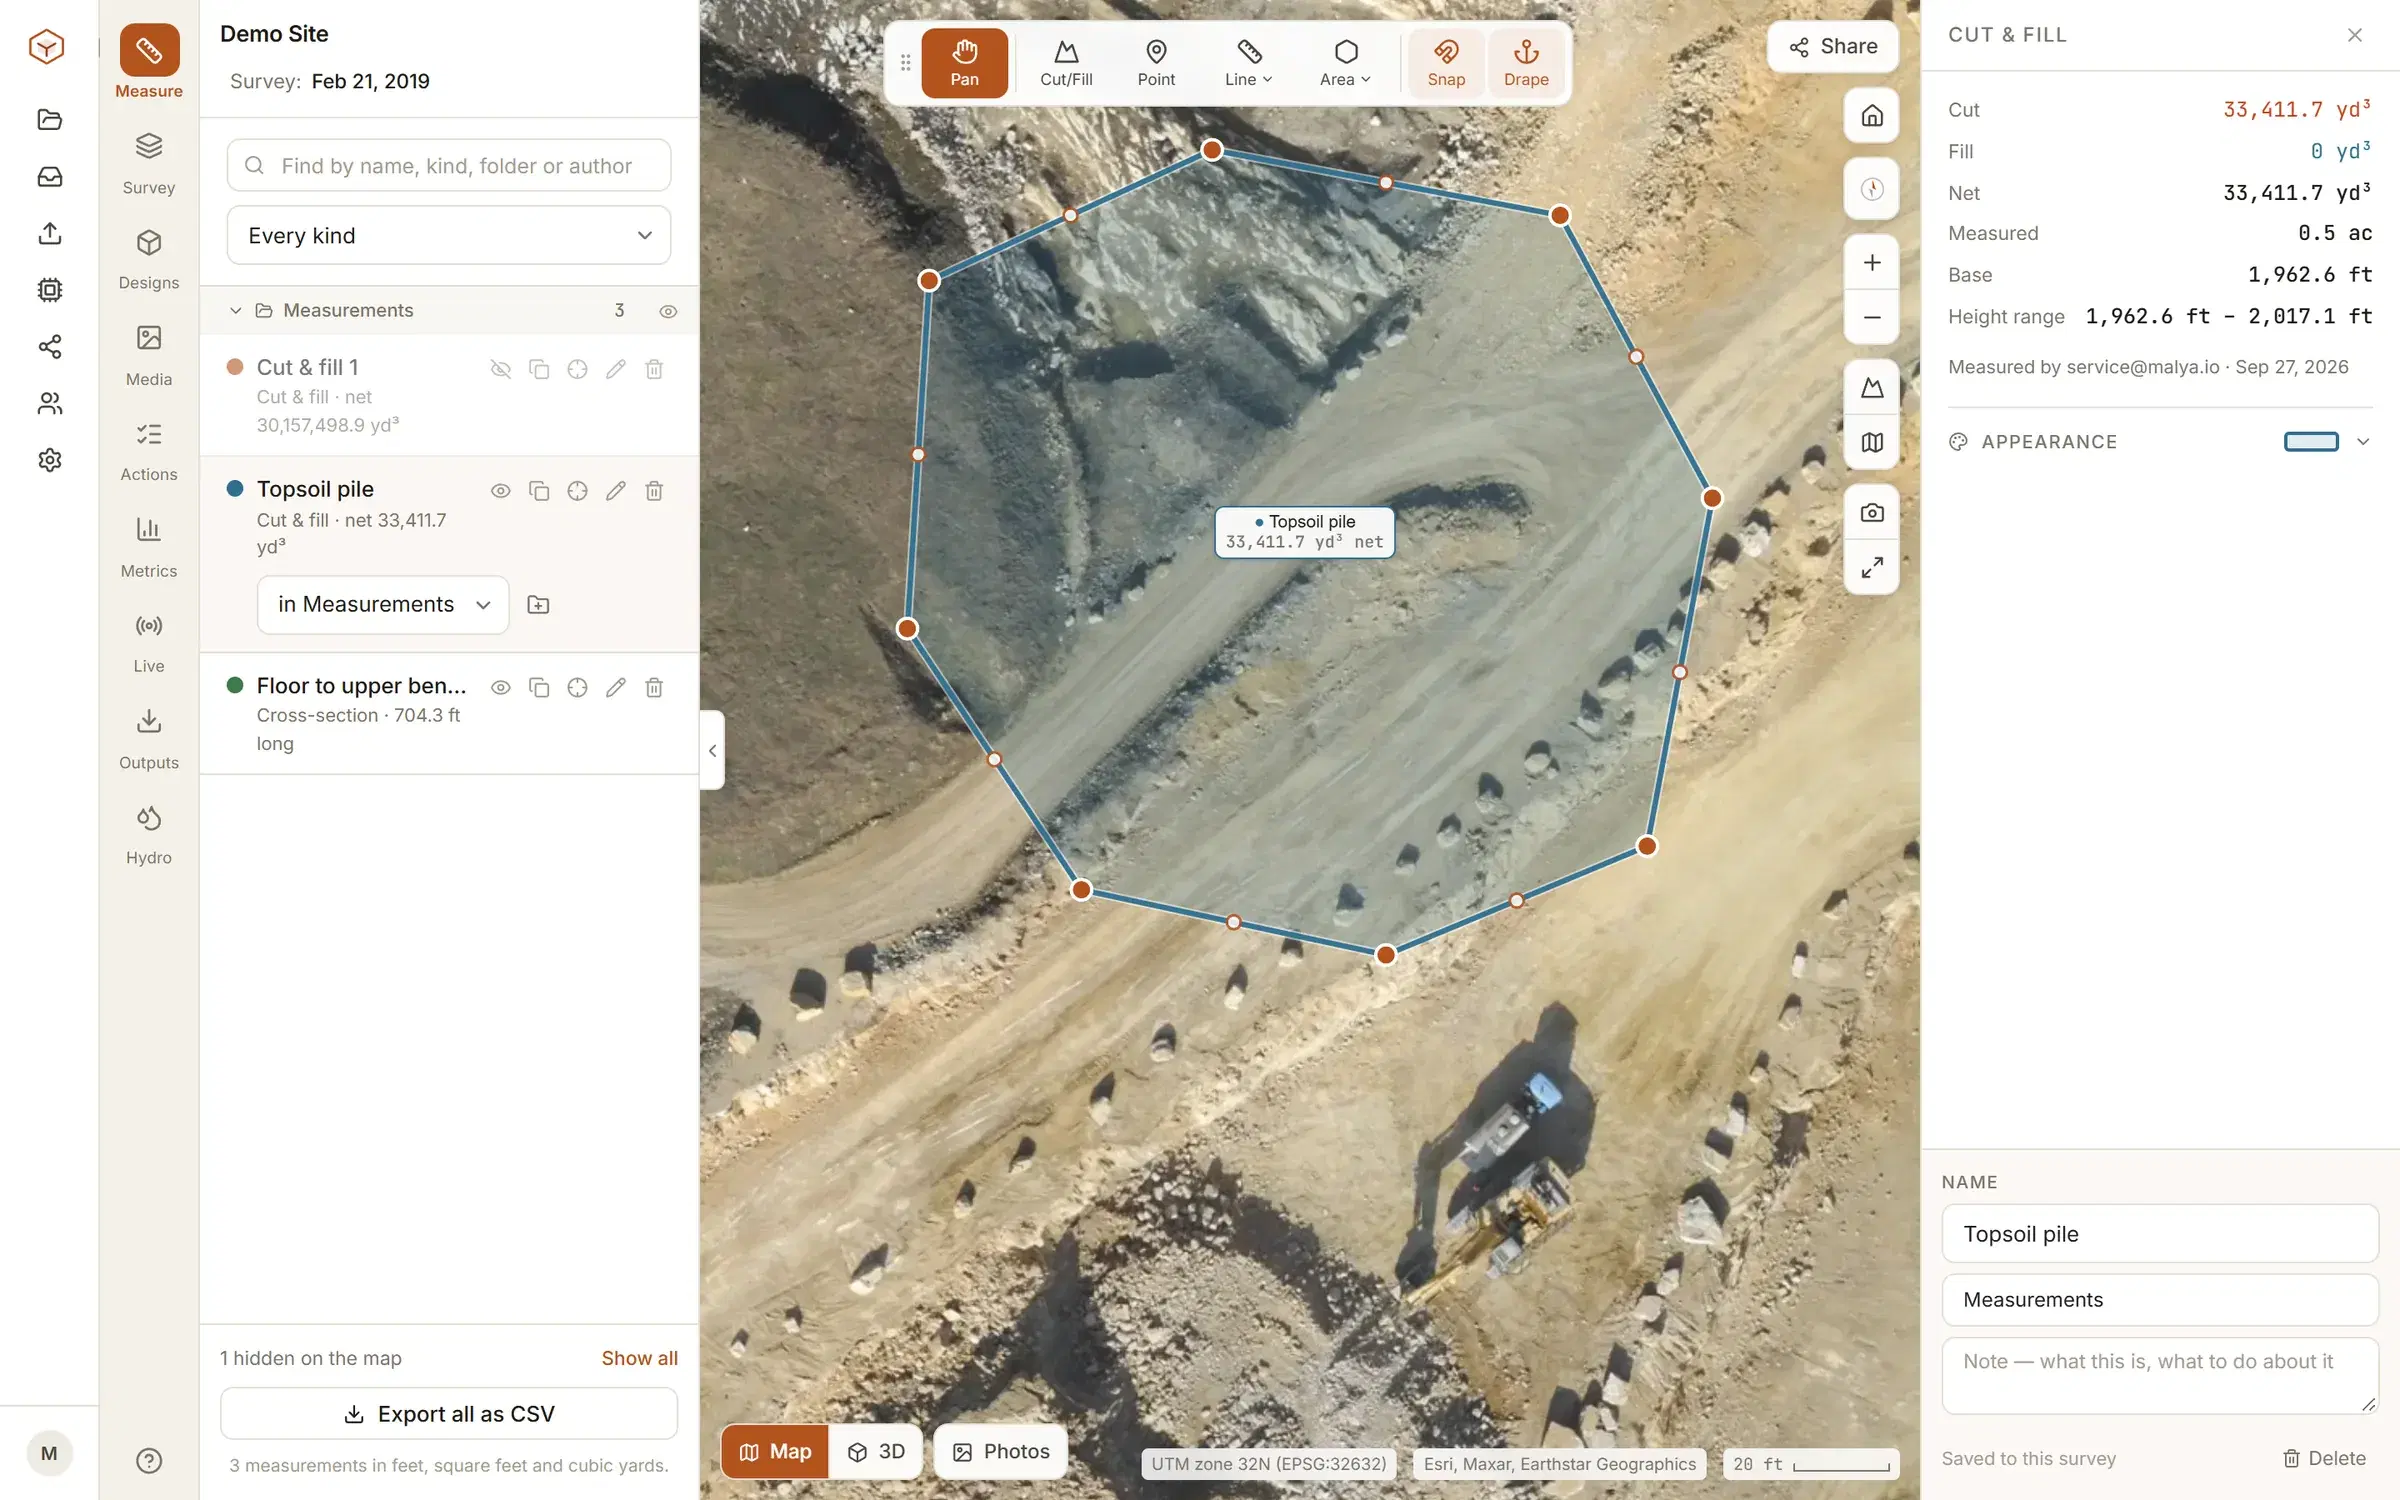
Hand over the files people can use downstream: the orthomosaic and elevation models as GeoTIFFs, the point cloud as LAS or LAZ, contours and linework as DXF or LandXML, and the report. The three-files guide says which file carries which measurement.
The same six steps for an object
Modelling a part, a sculpture or a casting on a table is the same job at a different scale, and the differences are instructive.
- Plan and captureWalk round the object in two or three rings at different heights, a photograph every 10–15°, with the object filling the frame and in focus throughout. 40 to 150 photographs.
- ScaleNo GNSS indoors, so a scale bar of known length in the pictures, or coded targets at measured spacing, sets the size. Without one the model is right in shape and unknown in size.
- Light and surfaceSoft, even light from all sides; no moving shadows. Shiny, dark and transparent surfaces defeat the matcher: a dusting of matte spray, or a scanner, for those.
The scanning page is the one to read before deciding whether an object wants a camera or a scanner at all.
Sources
Questions people ask
How many photos do I need?
Enough that every point is in several of them. For a site from a drone, 75% overlap along the line and 65% between lines gives a few hundred photographs for ten hectares at a 2–3 cm pixel. For an object on a table, 40 to 150 photographs round it in two or three rings is typical.
Can I do photogrammetry with my phone?
Yes, for objects and small scenes. Fix the exposure and focus, walk round the subject in overlapping steps, keep it filling the frame, include a scale bar or an object of known size, and avoid shiny, moving or blank surfaces. Phones have rolling shutters and small sensors, so keep still for each shot.
What time of day is best to fly?
Even light: an overcast day, or mid-morning and mid-afternoon in clear weather. Hard noon shadows move between lines and confuse matching; low sun throws long shadows and blows out highlights. Wind matters more than light for a small drone.
What should I check before I trust the model?
The report: the reprojection error (tenths of a pixel), how many photographs were aligned, the fit at the ground control points, and above all the errors at check points that were kept out of the solution. Then look at the model itself at the edges and on any blank surfaces.
See it on a real site.
Explore is free, with no card and no expiry: a real quarry, already flown and processed, with every measuring tool on it.
Read next
- Types of photogrammetry: aerial, close-range, satellite and moreAerial, close-range, satellite, underwater; stereo and structure from motion; which fits which job.
- What is photogrammetry? Definition, history and usesThe science of measuring from pictures: the idea, the history, and what a survey comes back as.
- How photogrammetry works: structure from motion, step by stepFeatures, matches, bundle adjustment, dense cloud, mesh, orthomosaic: each step, with what can go wrong at it.
- All resources